15 Nov 2020
Xcode doesn’t always like it when you swap branches, especially when there are a lot of code changes between the branches.
This can cause all kinds of build caches to become invalid forcing your Xcode to do lots of work.
What’s worse is now your mental resources are concentrated on getting your project compiling again instead of solving interesting problems.
The work I’ve been doing recently has been very bitty with helping colleagues by jumping on screen shares, reviewing PRs or even finding new requirements in my tickets that need work playing before I can continue.
All of these scenarios require me to checkout a different branch, which leads to the problems mentioned above.
Solution
Use git worktree to get multiple checkouts of a project using a single git repo.
If I have a project called epic-todo-list-app and a colleague asks for help on their branch named feature/allow-users-to-complete-tasks, I can run the following command:
git worktree add ../epic-todo-list-app-tmp feature/allow-users-to-complete-tasks
Now on disk I’ll have both projects
ls -1 src/ios
epic-todo-list-app
epic-todo-list-app-tmp
The original project folder will just be my repo in whatever state I was in.
The new project folder epic-todo-list-app-tmp will have the repo checked out to feature/allow-users-to-complete-tasks.
At this point I can now open both projects independently in Xcode and they’ll have their own derived data, which means I don’t need to deal with the time sink of getting Xcode to compile the new branch and then my original branch when I switch back.
NB - this technique is really helpful when working with different Xcode versions.
I can have one checkout for the beta and one for the GM version and they won’t destroy each other’s derived data.
Why use git worktree?
I’ve been using a variation of this technique for a long time now where I was just keeping multiple complete copies (full clones) of the repo.
This isn’t great for a few reasons:
- This is wasteful if you have a repo with a large history as you have two complete copies of the history
- The repos are independent - changes made in one are not reflected in another (unless you push/pull using local paths [not everyone knows you can do this])
- It’s really easy to
git fetch on one copy and forget to fetch on others so you end up with inconsistent states
git worktree solves the above problems by the fact that each project folder is backed by the same git repo on disk.
So any operations like fetch, checkout -b, merge…. are all reflected in each place you invoke git.
Cleanup
Once you’ve finished with the worktree you can easily remove it using the remove command.
If I wanted to get rid of the worktree I created earlier I’d call
git worktree remove ../epic-todo-list-app-tmp
It’s worth exploring the docs as they aren’t long or too scary looking https://git-scm.com/docs/git-worktree.
15 Nov 2020
It’s not rare to have code that uses Swift’s Result in a simplified way.
Not all call sites need to handle the error and may choose to throw the error away, opting instead to provide a default value.
There are a many ways to achieve this goal - here’s three alternate spellings to achieve the same thing:
let deliveryStatus: String

switch lookupDeliveryStatus() {
case let .success(value):
    deliveryStatus = value
case .failure:
    deliveryStatus = "In progress..."
}
Or
let deliveryStatus: String

if case let .success(value) = lookupDeliveryStatus() {
    deliveryStatus = value
} else {
    deliveryStatus = "In progress..."
}
Or
let deliveryStatus = (try? lookupDeliveryStatus().get()) ?? "In progress..."
The last example is pretty short but it’s quite noisy with a try? that is wrapped in () and then a usage of the nil-coalescing operator (??).
We can reduce a lot of the noise by defining an implementation of the nil-coalescing operator on the Result type directly.
extension Result {
    public static func ?? (result: Result, defaultValue: @autoclosure () throws -> Success) rethrows -> Success {
        switch result {
        case .success(let value):
            return value
        case .failure:
            return try defaultValue()
        }
    }
}
With this in place our original example becomes much more succinct
let deliveryStatus = lookupDeliveryStatus() ?? "In progress..."
The above felt a little uncomfortable to begin with because the thing returning a Result obviously felt it was important enough to provide some additional context in the event of a failure so surely we should pay attention to it.
I think this tension is interesting as it causes a pause to consider whether you really should be handling the error or are happy to ignore it.
Something that eases the tension for me is that the actual implementation is a copy/paste/tweak job from the function defined to work on optionals, so there is prior art that it’s reasonable to provide a convenience for this operation.
05 Nov 2020
In this post we’ll look at the --exec option on git rebase.
We’ll run through a couple of concrete examples and explain why you might consider them useful.
In a nutshell the --exec flag allows you to run a command against a range of commits starting at the point you specify and finishing on the latest commit.
Some worked examples will hopefully make this a little clearer.
Unit testing all commits
Having a clean history that compiles on each commit is really helpful when debugging especially for times when you have to reach for git bisect.
To validate that all commits are clean before pushing to the remote it would be useful to run the unit tests on every commit.
That might go a little like this:
Given the following history
* cadc5160 Integrate onboarding screen into main app
* 47e01676 Implement onboarding screen in sample app
* f5ff3165 Add onboarding-screen feature flag
*   e156c2b3 Merge pull request #1 from feature/update-terms-of-use
|\
We can grab the sha of the commit before the new work (in this case e156c2b3) and then run
git rebase e156c2b3 --exec "swift test"
The result will be that git will check out each commit in turn and run swift test.
If the tests fail on any of the commits then git stops the rebase and waits for us to resolve the issues.
If you perform the above before pushing you can guarantee that all the commits are in good order.
You can also use the same mechanism in your CI pipelines if you want to enforce that each commit should compile and pass tests.
Teams often run some kind of code formatter or linter to catch common issues and avoid the same conversations occurring over and over in code reviews.
Running these tools is great but ideally we’d want to ensure they are run for every commit to avoid code churn.
To illustrate the issue with code churn look at this watered down example:
Below we have 3 commits on a project to the same area in one file. The first commit is implementing a bug fix, the second is adding new work and the last commit is a result of running a formatting tool.
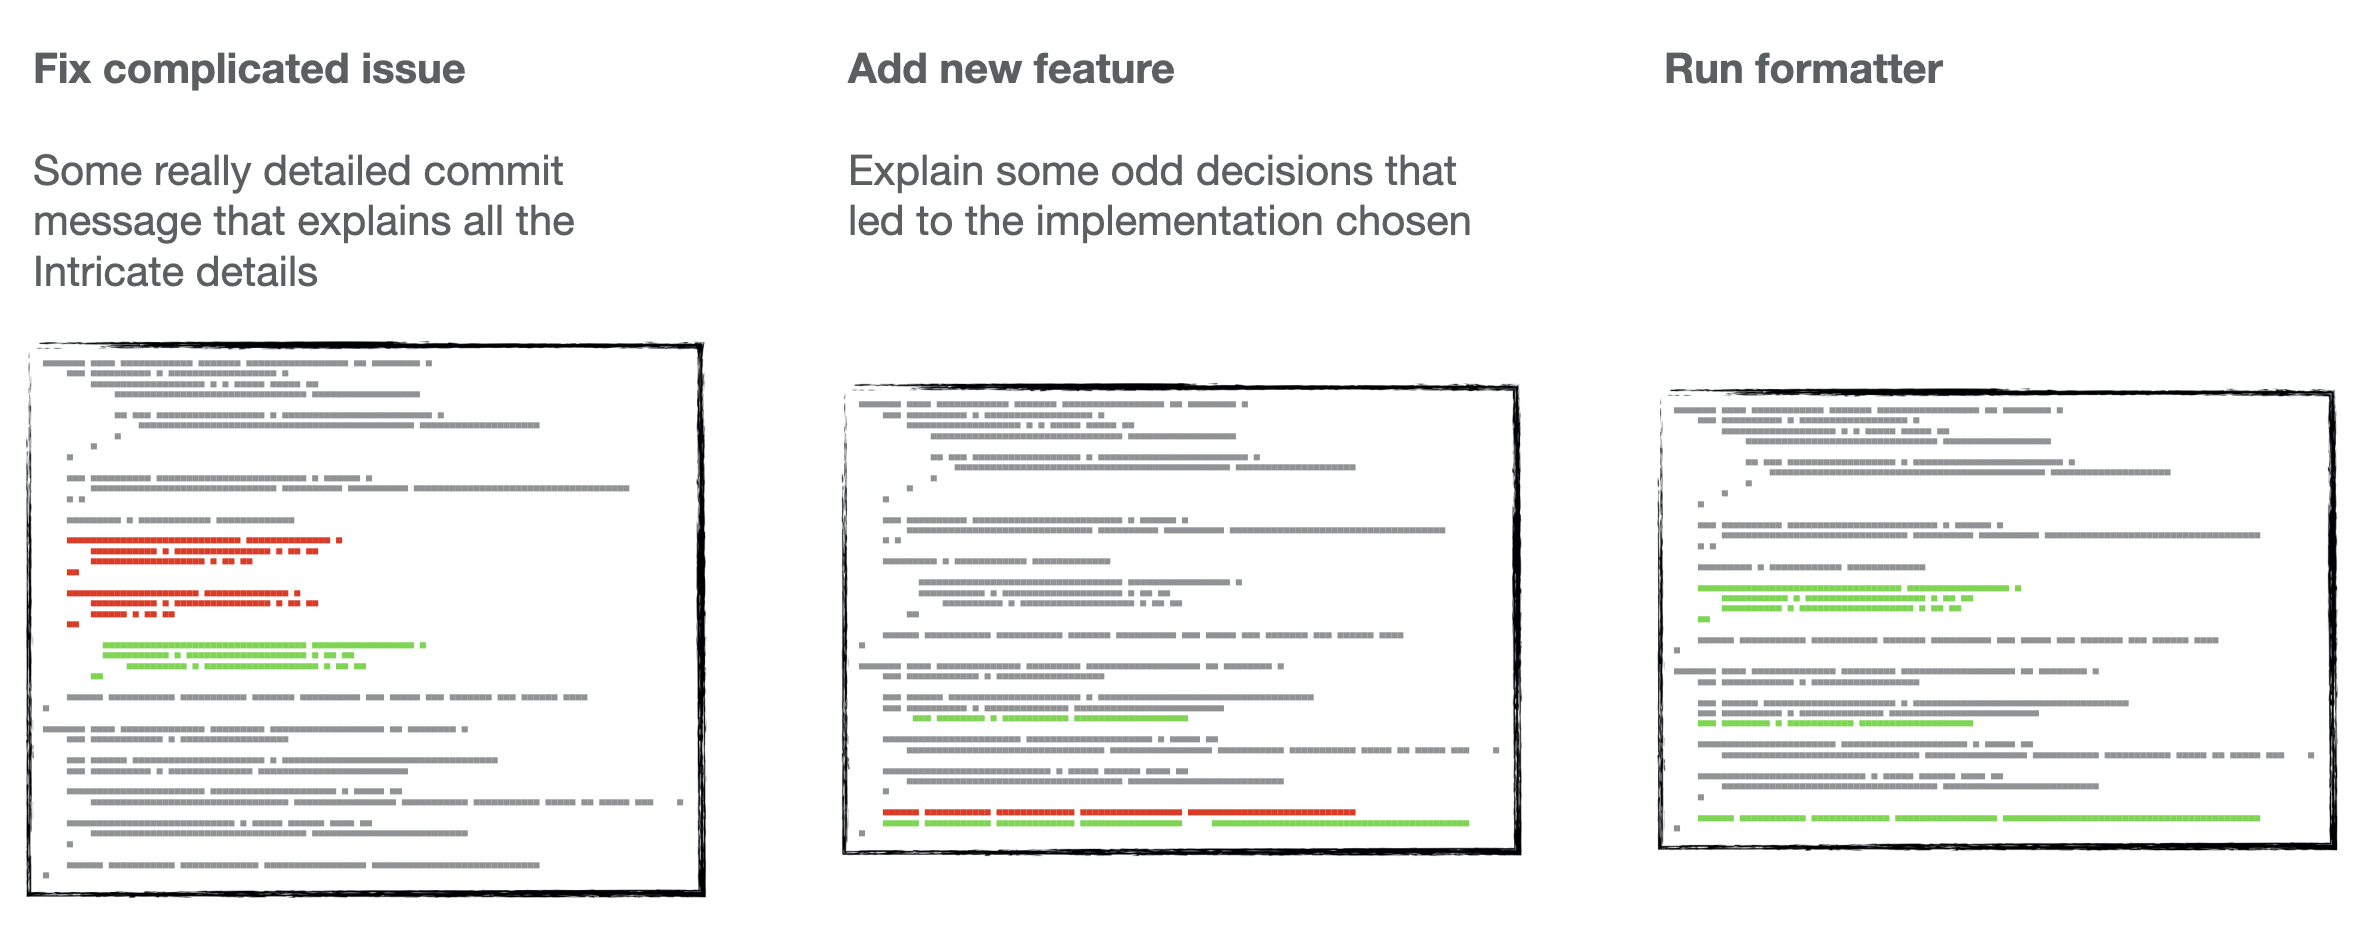
The result of this history is that when there is an issue and we run git annotate on the file to find out the motivation for the changes we end with all of our changes being attributed to the very unhelpful “Run formatter” commit message.
If we wrote meaningful messages on the original commits then that effort is now more difficult to find and causes us to reach for more involved git commands like git log --follow.
This is another great use case for git rebase --exec as we can run the formatter/linter on each commit before we push to the remote.
If there are any commits that fail the formatter/linter then git will pause the rebase, wait for us to fix the issues and then continue once we have resolved them.
More
The --exec argument can run any command and decides to continue the rebase or stop depending on the exit status of the command.
This means you can write any custom command or program that you’d want to run against a range of commits to verify things and as long as you use an appropriate exit status then git will automatically continue or stop.