12 Oct 2022
When developing for iOS it’s often useful to navigate to the files you create in the simulator so you can inspect everything is how you expect it to be.
The location of where the files live on disk has changed throughout the years but one thing has remained constant - it’s awkward to locate where the files are.
Now days simctl and excellent wrappers around it like Control Room help make it simpler to locate your files but there is still too much friction.
The friction of locating files becomes even more evident when working in a team where everyone has different tooling and levels of comfort with the various options.
Here’s a hack solution that avoids any third party tooling and keeps things consistent for all members on the team.
The general idea is to detect we are running in a simulator and then drop a symlink on your desktop.
Checking out the environment variables available when running in the simulator reveals there is all the information we need to make this happen.
#if targetEnvironment(simulator)
    let environment = ProcessInfo.processInfo.environment
    if
        let rootFolder = environment["SIMULATOR_HOST_HOME"].map(URL.init(fileURLWithPath:))?.appendingPathComponent("Desktop/SimulatorData"),
        let simulatorHome = environment["HOME"].map(URL.init(fileURLWithPath:)),
        let simulatorVersion = environment["SIMULATOR_RUNTIME_VERSION"],
        let simulatorName = environment["SIMULATOR_DEVICE_NAME"],
        let productName = Bundle.main.infoDictionary?["CFBundleName"]
    {
        let symlink = rootFolder.appendingPathComponent("\(productName) \(simulatorName) (\(simulatorVersion))")

        let fileManager = FileManager.default
        try? fileManager.createDirectory(at: rootFolder, withIntermediateDirectories: true)
        try? fileManager.removeItem(at: symlink)
        try? fileManager.createSymbolicLink(at: symlink, withDestinationURL: simulatorHome)
    }
#endif
Now whenever you run your app in the simulator a fresh new symlink will be created on your mac’s desktop making it really quick to go from thinking “I need to look in my apps data folder” to being there in Finder.
Wrap up
This problem has annoyed me for a long time (I wrote a Ruby gem 10 years ago to help with locating simulator directories ).
I’ve used multiple tools over the years from my gem, to various third party apps and now I mostly use simctl directly.
This is my new favourite solution that requires no third parties or searching through my zsh history - it’s only taken 10 years of pushing this particular stone up a hill to come up with this idea 🤦🏼♂️.
06 Oct 2022
A really useful trick when debugging is to subclass the thing you are interested in just to make it easier to search for inside the various debugging tools.
Worked example
I was hunting down a retain cycle using Xcode’s memory graph tool but although the tool is excellent the code I was debugging was not really set up to be useful.
In my example I had a CustomView (not its real name) that is used many times but I was only interested in one particular usage.
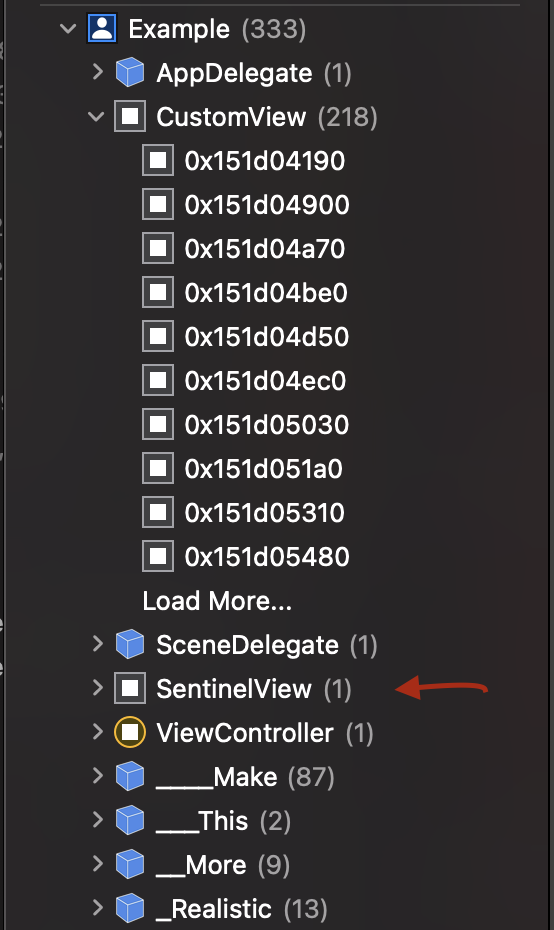
When spinning up the Debug memory graph tool I get presented with something like the below:

As you can see in the above for this run of the app I have 218 instances of CustomView, which means it will be a mighty task to try and locate the correct one before I can conduct my analysis.
Keep in mind that debugging could take multiple runs so I’d have to repeat the process of finding my view each time before I can doing any real investigation.
To make things easier on myself if I know roughly the area of code that might be causing the issue I can create a subclass to help make this search easier e.g.
class SentinelView: CustomView {}
Now at the call site in question I instantiate my SentinelView instead of CustomView, everything behaves the same except when I open the memory graph tool this time my job is much simpler
Other uses
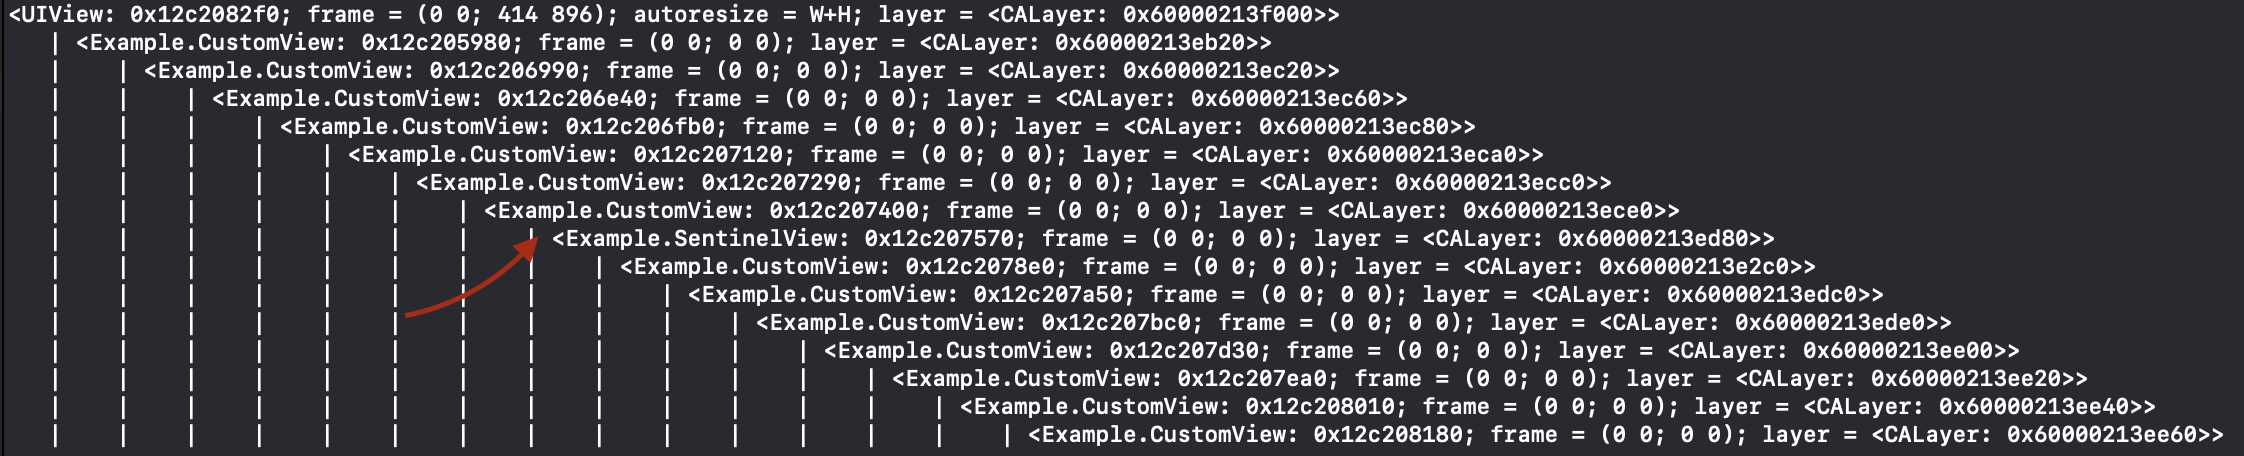
Here’s an example of printing the view hierarchies recursiveDescription
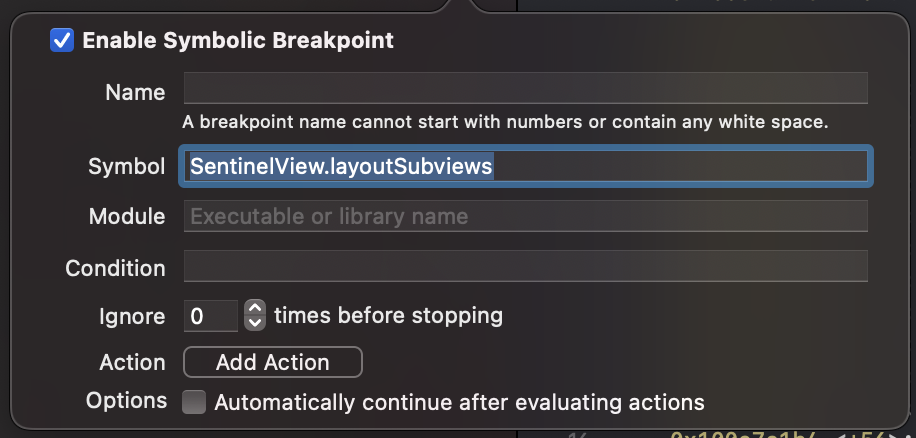
Here’s adding a symbolic breakpoint to this one type
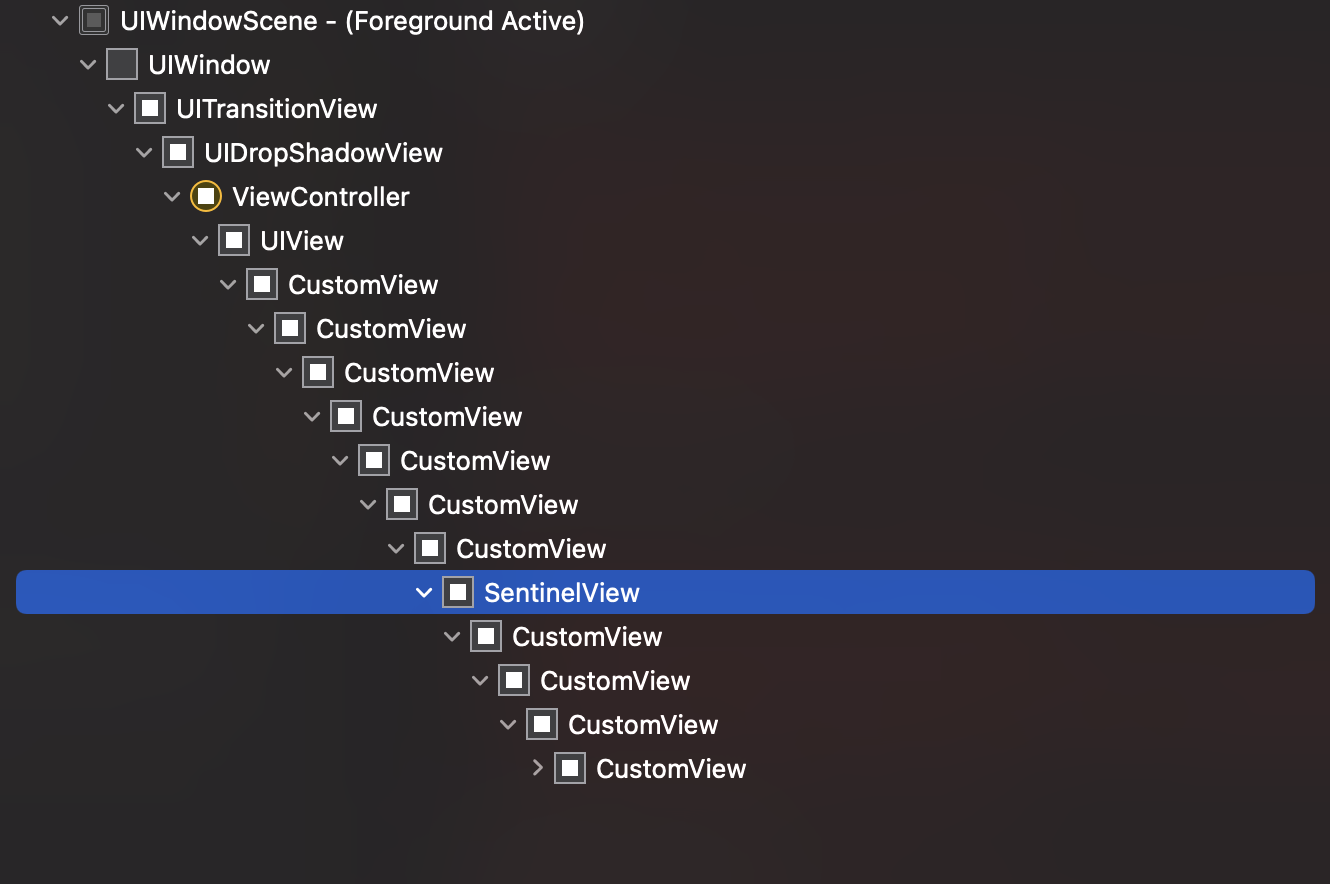
Here’s locating the view in the view hierarchy debugger
There are plenty more places like instruments, logging etc to make use of this technique.
Conclusion
This technique has been in my back pocket for many years and it’s always been really useful.
For as long as we have tools that show information and log class names it’s always helpful to be able to help narrow the search.
17 Sep 2022
The set up and usage of the KSP (Kotlin symbol processing) api can be quite intimidating to begin with but it can be quite rewarding once you’ve found your feet.
I started with KSP in my day job for an interesting project to generate code to target JVM/JS that is then compiled by KMP (Kotlin Multiplatform) and eventually run across SpringBoot, Android and iOS.
The side benefit of doing a fairly deep dive is then seeing other interesting opportunities to utilise the technology.
This post recreates some validation that is not useful outside the scope of my project but really showcases how with a few lines of code you can get powerful validation for even niche use cases.
Context
One of the modules in my project needed to enforce that we only used properties with no backing field e.g. fields defined as computed properties val label get() = "Some Label".
This module has lots of classes with many properties making it difficult to manually audit and keep on top of.
After doing the first manual audit to verify everything was computed I had an idea to use KSP to do this for me in future.
Processor
In my use case the whole module needs the same validation applied so I don’t need to be precise about finding specific elements of the code.
My high level strategy is to do the following:
- Enumerate every file in the project
- For each file enumerate all the classes it contains
- For each class enumerate all properties
- Log a helpful error for every property that has backing storage
There are different ways you can write your KSP code - for cases where you are collecting information about your code to act on you might want to use the visitor pattern and helper classes available.
To achieve my goal I can forgo using visitors as the steps above map nicely onto the KSP api and I don’t need to collect any information I’m just going to log errors outright to cause a failed compile.
The code (with markers) ended up something like:
class Processor(private val logger: KSPLogger) : SymbolProcessor {
    override fun process(resolver: Resolver): List<KSAnnotated> {
/* 1 */ resolver.getAllFiles().forEach { file ->
/* 2 */     file.declarations .filterIsInstance<KSClassDeclaration>().forEach { klass ->
/* 3 */         klass.getAllProperties().forEach { property ->
                    if (property.hasBackingField) {
                        val message = """
                            All properties have to be computed. e.g.

                            - val ${property.simpleName.asString()} = ...
                            + val ${property.simpleName.asString()} get() = ...
                        """.trimIndent()
/* 4 */                 logger.error(message, property)
                    }
                }
            }
        }
        return emptyList()
    }
}
The handful of lines above pack a big punch.
If any property is added that has a backing field the build will fail to compile and output an error message with some useful tips and the exact source location e.g.
[ksp] .../example/src/main/kotlin/com/paulsamuels/Example.kt:4: All properties have to be computed. e.g.

- val example = ...
+ val example get() = ...
Full disclosure
The code above is the simplest possible processor I could write and in reality there is a little more work involved in getting everything wired up but it’s not too difficult and is very well documented in the KSP quickstart.
I won’t repeat the quickstart guide as this post will probably just go out of date but as a rough illustration of how little code it takes to wire things up I have the following
processor/
├── build.gradle.kts
└── src
    └── main
        ├── kotlin
        │   └── com
        │       └── paulsamuels
        │           ├── Processor.kt
        │           └── ProcessorProvider.kt
        └── resources
            └── META-INF
                └── services
                    └── com.google.devtools.ksp.processing.SymbolProcessorProvider
The META-INFO is a one line file and the ProcessorProvider.kt is just
class ProcessorProvider : SymbolProcessorProvider {
    override fun create(environment: SymbolProcessorEnvironment) = Processor(environment.logger)
}
This is the entirely of the processer and then you just need to hook this up to the target you want to process.
Conclusion
The actual validator above probably has no practical use outside of my project but hopefully it illustrates that KSP isn’t all that scary and you can build out some fairly niche validations to match your needs with relatively few lines of code.