Mobile UI testing with Maestro
20 Nov 2023Maestro is an interesting UI automation framework that
is built on learnings from its predecessors (Appium, Espresso, UIAutomator, XCTest) and allows you to easily define and test your Flows
I tried it out and was impressed with how quickly I could get something working with so few dependencies. The biggest issue for me is that YAML is used for defining flows, which means it’s not very dynamic, you can’t leverage IDE tools like autocomplete and nobody likes parsing failures due to whitespace issues.
I managed to get around some of these issues by creating a DSL in a modern language which can then spit out the YAML to feed to the maestro cli. Here’s a dive into that experimentation using Kotlin to reach this result
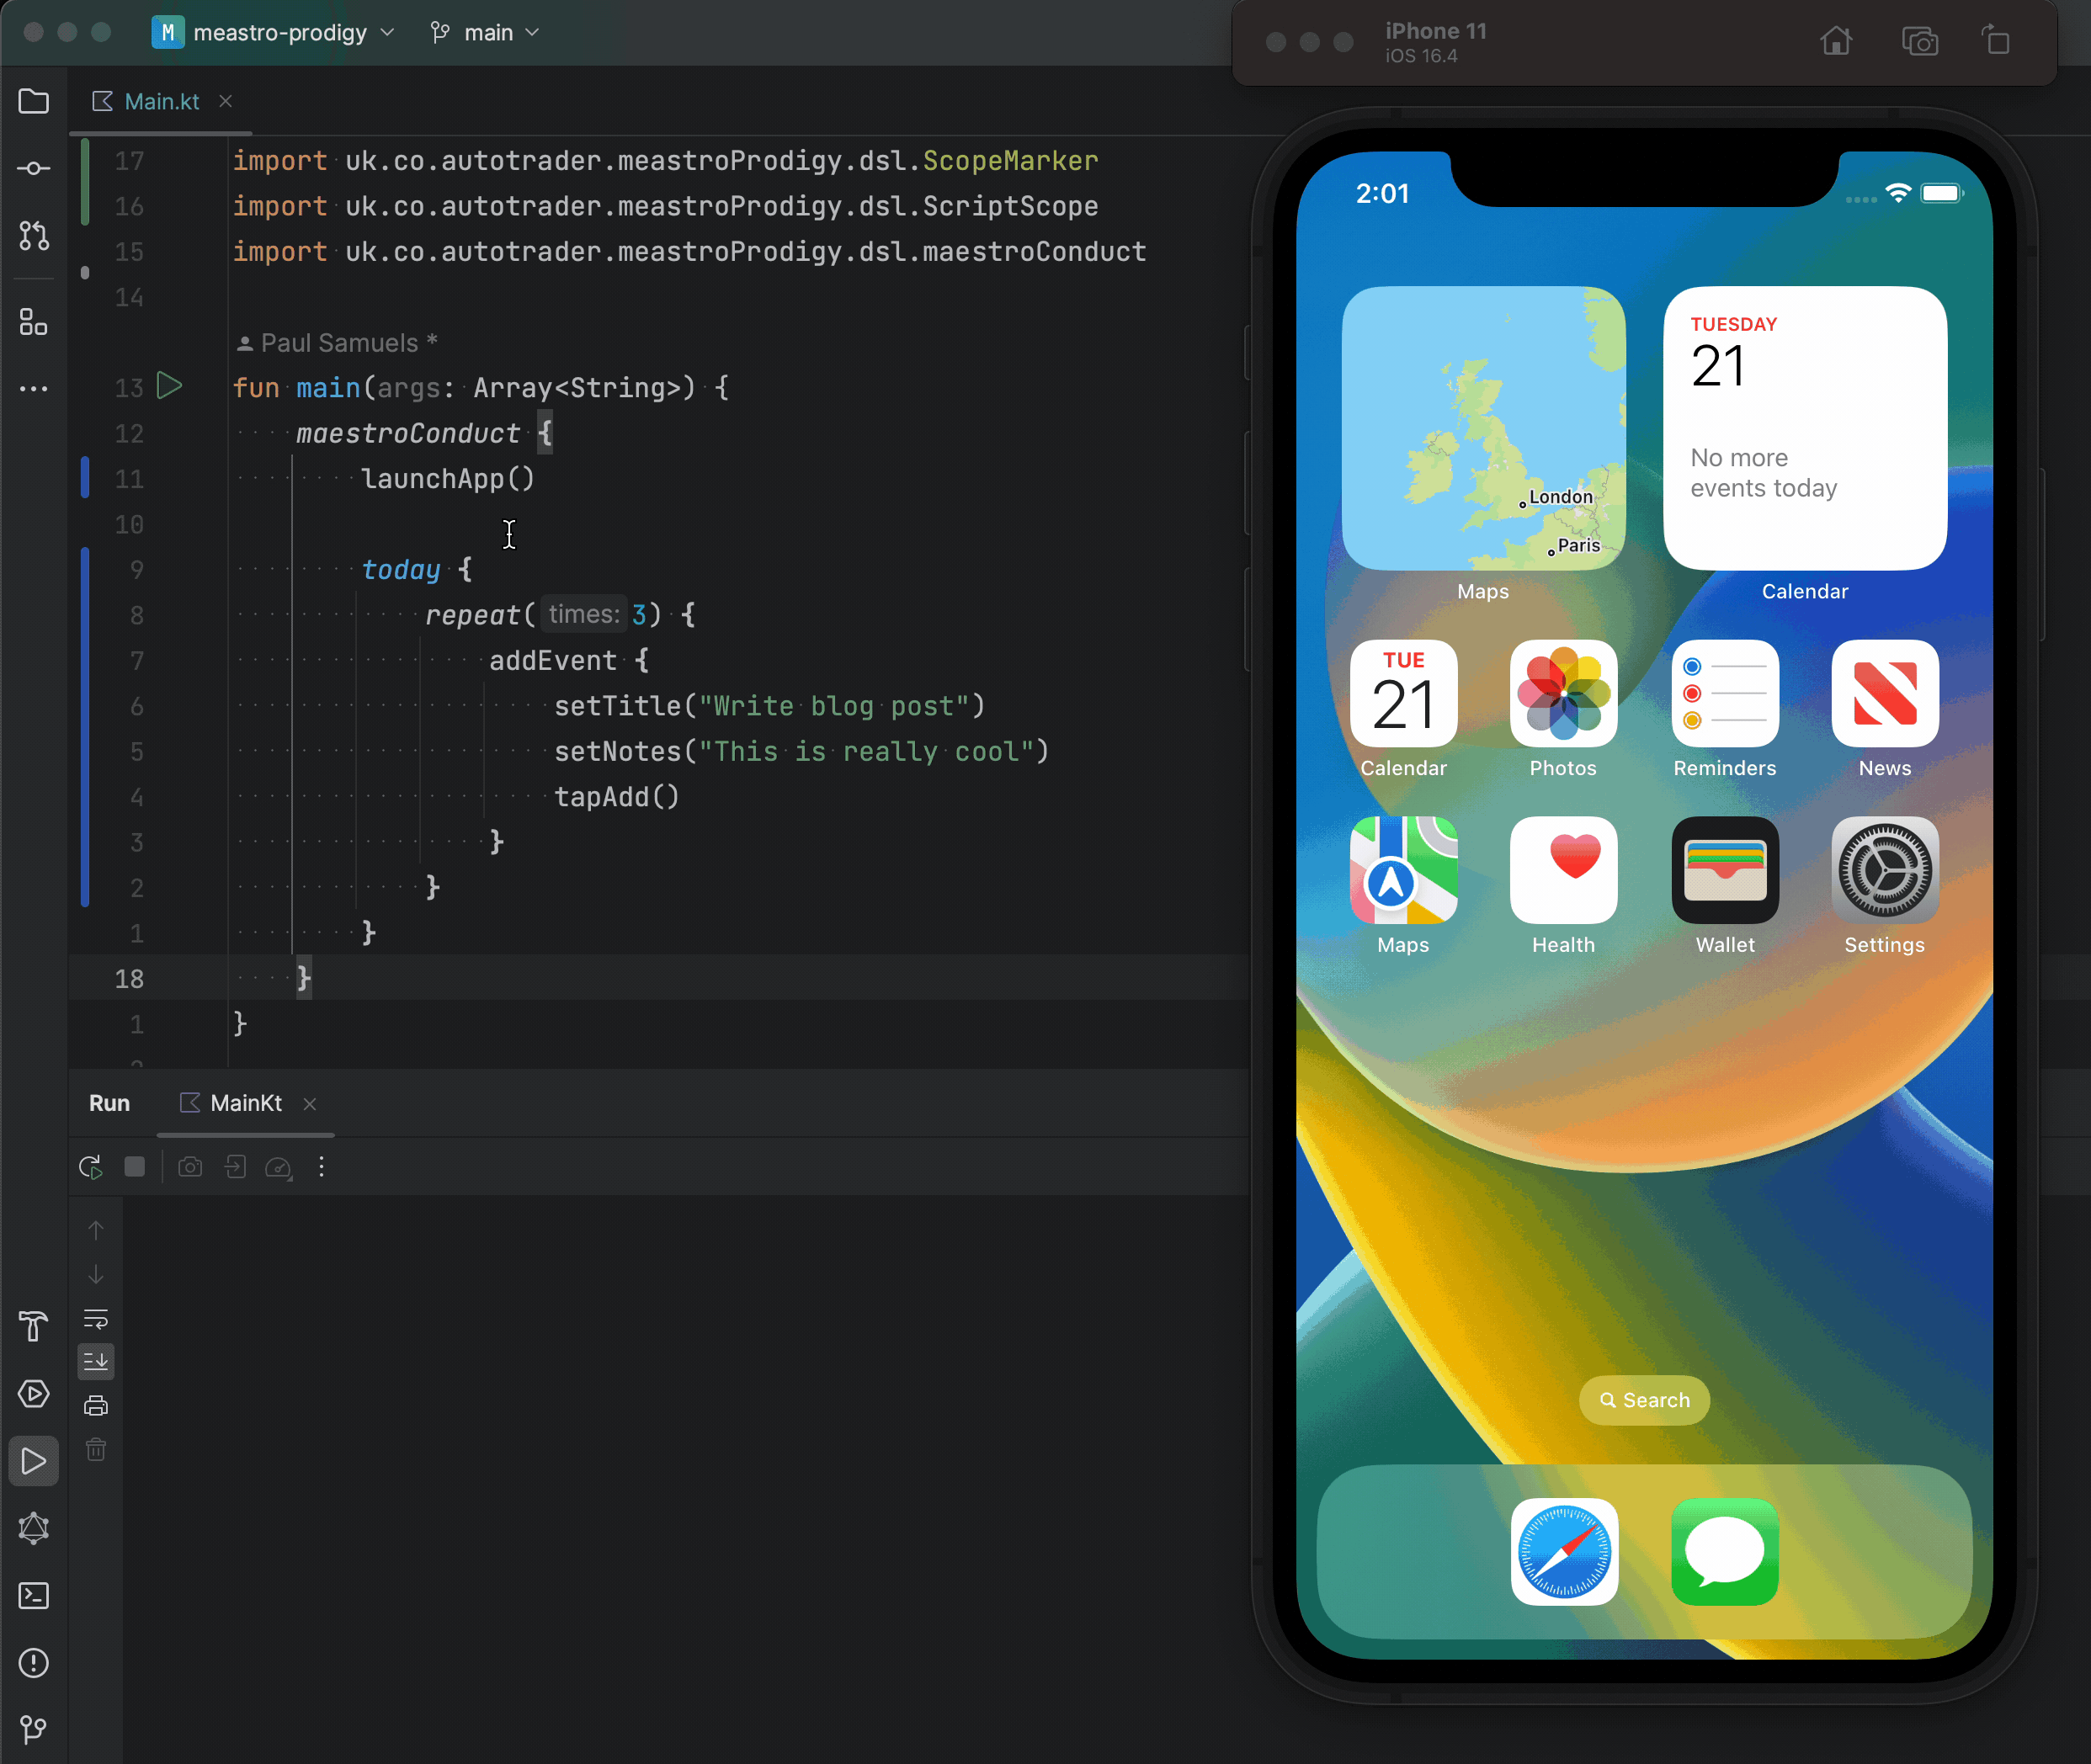
Figure out what we need to build
First let’s start by looking at a basic script that launches the iOS calendar app and then taps on the plus button. This gets us a feel for the yaml document we need to generate.
appId: com.apple.mobilecal
---
- launchApp
- tapOn: Add
Hopefully in the above the commands are fairly self explanatory.
I started by thinking about the API I wanted to write and then worked backwards from there. In Kotlin I’d want to write something like the following:
maestroConduct {
    launchApp()
    tapOn("Add")
}
It might look simple to achieve the above but there are quite a few language features that we need to take advantage of:
- Interfaces and code visibility
- Higher order functions (the
maestroConductfunction takes another function as its argument) - Functions with receivers (the function passed as a trailing closure will be called on an explicit receiver)
@DslMarkerwill be used to reduce the autocomplete options the IDE offers inside the scope of the trailing closure
As a high level plan my aim is to build a List of command structures by invoking the DSL e.g. when I invoke launchApp() it needs to add a command of "launchApp" to my commands list.
I can start by defining an interface for the two methods I currently support
interface ScriptScope {
    fun launchApp()
    fun tapOn(text: String)
}
Next I’ll write a function that takes a lambda with a receiver of ScriptScope that is responsible for invoking the lambda and collecting the list of commands.
internal fun buildSteps(configure: ScriptScope.() -> Unit): List<Any> = mutableListOf<Any>().also { steps ->
    object : ScriptScope {
       override fun launchApp() {
           steps.add(
               "launchApp"
           )
       }

       override fun tapOn(text: String) {
           steps.add(
               mapOf("tapOn" to mapOf("text" to text))
           )
       }
    }.configure()
}
The ScriptScope.() -> Unit is Function literal with receiver which means that the lambda we pass will be invoked with ScriptScope as the receiver (read: this), which means that it has access to all the methods declared on ScriptScope.
The helper function declared above contains a concrete implementation of the ScriptScope interface which essentially just starts pushing basic maps and strings into a list of commands that is returned at the end.
With this defined I can now call something like
buildSteps {
    launchApp()
    tapOn("Add")
}
and it will build the equivalent of
listOf(
    "launchApp",
    mapOf("tapOn" to mapOf("text" to "Add"))
)
This is almost the original code I envisaged I’d want to write and matches the structure in the YAML but building a list of commands isn’t the ultimate goal, we need to be able to run them as well.
Running commands
In order to test we are on the right track with building up a layer on top of maestro we need to see it working. The full flow we need to achieve is
- Run the DSL to collect commands
- Serialize to YAML and write to a file
- Invoke the maestro cli
These steps are what the maestroConduct function will handle.
fun maestroConduct(configure: ScriptScope.() -> Unit) {
    val tmpFile = createTempDirectory()/"commands.yaml"

    tmpFile.toFile().writeText(
        """
            appId: com.apple.mobilecal

        """.trimIndent() +
                YAMLMapper()
                    .setSerializationInclusion(JsonInclude.Include.NON_NULL)
                    .writeValueAsString(buildSteps(configure))
    )

    ProcessBuilder("maestro", "test", tmpFile.toString())
        .redirectOutput(ProcessBuilder.Redirect.INHERIT)
        .redirectError(ProcessBuilder.Redirect.INHERIT)
        .start()
        .waitFor()
}
Centralise knowledge
The above is mildly interesting noodling with Kotlin but now it’s time to make this something more useful to a wider team. In UI testing there is the concept of the PageObject pattern where we abstract away low level details about how to work with parts of UI.
In this example I might add a PageObject for the TodayScope (where the app launches me to) and an AddEventScope which represents the form for inputting an event.
Again let’s look at the code we might want to write and then work backwards
maestroConduct {
    launchApp()
    today {
        addEvent {
            setTitle("Write blog post")
        }
    }
}
In the above the today scope is here to only introduce methods that are applicable to the today screen.
Equally the addEvent introduces a scope that will only expose functions that make sense on the add event screen.
Some code to do this might look like:
interface TodayScope {
    fun addEvent(configure: AddEventScope.() -> Unit)
}

interface AddEventScope {
    fun setTitle(title: String)
}

internal fun ScriptScope.buildAddEvent(configure: AddEventScope.() -> Unit) {
   object : AddEventScope {
       override fun setTitle(title: String) {
           // insert code to perform steps here
       }
   }.configure()
}

fun ScriptScope.today(configure: TodayScope.() -> Unit) {
    object : TodayScope {
        override fun addEvent(configure: AddEventScope.() -> Unit) {
            tapOn("Add")
            buildAddEvent(configure)
        }
    }.configure()
}
The above looks complicated but it’s just boiler plate to introduce our scopes.
There is a problem with the scopes currently where inside the trailing closure passed to addEvent our code can see the AddEventScope context and its parent context of TodayScope which means you could write this non sensical code
today {
    addEvent {
        addEvent {} // This doesn't make sense ❌
    }
}
This is where we can leverage the @DslMarker annotation for scope control.
We start by introducing an annotation
@DslMarker
annotation class ScopeMarker
With this annotation defined we can add it to our scopes above
@ScopeMarker
interface TodayScope {
    fun addEvent(configure: AddEventScope.() -> Unit)
}

@ScopeMarker
interface AddEventScope {
    fun setTitle(title: String?)
}
Now the compiler doesn’t allow our code inside the addEvent trailing closure to see the parent scope without being explicit (e.g. [email protected]).
This should prevent accidental misuse.
With that out of the way we have another small thing to resolve with the tapOn method.
Currently it selects items by looking for literal text but when we inspect the app (using the maestro studio command) we can see there is a better option of searching by id.
It’s often better to search by id as it will be locale agnostic and if it works the same as XCTest it should be much faster than looking up text.
To allow for this let’s add a little abstraction to the ScriptScope.tapOn function to take a selection strategy:
interface ScriptScope {
    ...
    fun tapOn(text: String)

    // Selectors

    fun id(id: String) = Selector("id", id)
    fun text(text: String) = Selector("text", text)
    data class Selector internal constructor(val key: String, val value: String)
}
With this in place we can switch between the two selector approaches with ease
maestroConduct {
    tapOn(id("my.id"))
    tapOn(text("Button title")
}
The next tangent is that entering text is not something we have covered.
It’s more of the same stuff we have done before so we’ll add a new function to the ScriptScope interface and then add an implementation
@ScopeMarker
interface ScriptScope {
    ...

    fun enterText(text: String)
}

internal fun buildSteps(configure: ScriptScope.() -> Unit): List<Any> = mutableListOf<Any>().also { steps ->
    object : ScriptScope {
        ...
        override fun enterText(text: String) {
            steps.add(mapOf("inputText" to text))
        }
    }
}
With those three detours out of the way we can implement the actions required for setting title
internal fun ScriptScope.buildAddEvent(configure: AddEventScope.() -> Unit) {
   object : AddEventScope {
       override fun setTitle(title: String?) {
           tapOn(id("Title"))
           enterText("Write blog post")
       }
   }.configure()
}
The above doesn’t compile because of a previous change adding @ScopeMarker, which now means inside AdventScope we can’t see the ScriptScope methods we need (tapOn and enterText).
We can overcome this by saying that our object will also conform to ScriptScope and the implementation will come from the parent context
- object : AddEventScope {
+ object : AddEventScope, ScriptScope by this {
This may seem like a lot of work but the centralising of this knowledge should really pay off.
If someone from my team wanted to create a quick script to test some UI they wouldn’t need to dig around in the weeds of figuring out what identifiers they need to tap and details around entering text.
Instead they can use a typesafe api with autocompletion that will guide them to write the right things - if someone is stuck they can type this. and the compiler will suggest the available methods.
The other advantages of this approach is that we are using a full programming language so we could do any external setting up of test data or network requests to configure environments before dumping the YAML and running it.
A simple example of where a full programming language is useful is to imagine we get a bug after adding 3 notes, we could simply put the current steps in a repeat and very quickly generate the YAML to get our app in the right state
today {
    repeat(3) {
        addEvent {
            setTitle("Write blog post")
            setNotes("This is really cool")
            tapAdd()
        }
    }
}
The above is much more concise than the raw YAML output
appId: com.apple.mobilecal
---
- launchApp:
    arguments: {}
- tapOn:
    text: "Add"
- tapOn:
    id: "Title"
- inputText: "Write blog post"
- tapOn:
    id: "All-day"
- "scroll"
- tapOn:
    text: "Notes"
- inputText: "This is really cool"
- tapOn:
    text: "Add"
- tapOn:
    text: "Add"
- tapOn:
    id: "Title"
- inputText: "Write blog post"
- tapOn:
    id: "All-day"
- "scroll"
- tapOn:
    text: "Notes"
- inputText: "This is really cool"
- tapOn:
    text: "Add"
- tapOn:
    text: "Add"
- tapOn:
    id: "Title"
- inputText: "Write blog post"
- tapOn:
    id: "All-day"
- "scroll"
- tapOn:
    text: "Notes"
- inputText: "This is really cool"
- tapOn:
    text: "Add"
In fairness to maestro it does have the ability to run sub flows but that’s another thing people on the team would have to learn and understand.
Side notes
Using the Apple calendar app really shows how important it is to add good identifiers to your code to make this stuff easy. The Calendar app doesn’t do this so most of the time the best you can do it search for text and that’s not guaranteed to be unique. There were certain things I just couldn’t do, like tap on the “All-day” toggle, because the ability to identify views was just plain missing.
Conclusion
I really like Maestro and think it could be a really useful if a little time is invested in refining it to a specific project’s needs. This post looks at a few interesting techniques related to Kotlin that improve the user experience for me but YMMV.